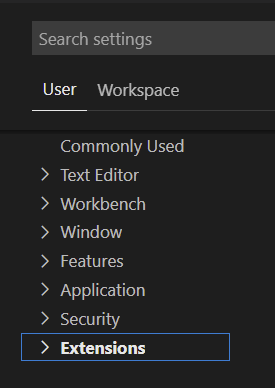
Visual Studio Code is flexible that we know. Such flexibility is achieved by having a world of extensions built for everyone’s needs and by allowing configuring them with custom parameters. With Visual Studio Code running on Windows, the shortcut CTR + , will display the settings tab for you. You can find the same section from the menu File > Preferences > Settings. From User or Workspace tab, expand the Extensions menu, and you will see all settings available for every extension you have installed.
Set things!
1Naturally, GitMarker wouldn’t be an exception once I had some parameters I wanted to set outside the UI. Such a thing can be done using the package.json manifest I’ve shown before with previous chapters. There’s a dedicated contribution point named configuration. I only used the following schema properties with GitMarker, but there are many others you can combine. Check them on the Extension API documentation. You can see the ones GitMarker is using below.
"configuration": {
  "title": "GitMarker",
  "properties": {
    "gitmarker.autoSyncEnabled": {
      "type": "boolean",
      "default": true,
      "description": "Synchronize my bookmarks every time the extension is activated."
    },
    "gitmarker.gitClone.defaultClonePath": {
      "type": "string",
      "description": "The default path for cloning repositories."
    },
    "gitmarker.gitClone.alwaysUseDefaultClonePath": {
      "type": "boolean",
      "default": false,
      "description": "Always use the default clone path when cloning repositories."
    },
    "gitmarker.searchResultsPerPage": {
      "type": "number",
      "minimum":0,
      "maximum": 100,
      "description": "The number of results per page when searching repositories on GitHub (max 100)."
    }
  }
}
title:
The title is to be displayed on both the left-tab menu and the heading title of the configuration. It’s recommended you use the same name as your extension. It will, of course, ease the end-user to locate it.
properties:
The object can define a set of configurations where the schema properties can be described using the attributes shown below. Notice that the camel-cased gitmarker.autoSyncEnabled will be automatically rendered as Auto Sync Enabled and become the title of that configuration item. I struggled a bit to find how to order or group these items at my will, and at the moment, the only way I could skip the default alphabetical order was by adding a sort of namespacing-based that would force the precedence, yet alphabetically ordered but slightly better. Definitely a thing the API can improve.
type:
Defines the field type to be stored and rendered, such as number, string and boolean, for instance.
default:
You can define a default value here. Just beware of the value type, which has to match the field type you specified.
description:
It provides an extended description just above/beside the input field. Use it to inform the end-user what the setting does.
minimum / maximum:
Minimum and Maximum values for numbers. It will display error messages in case of the typed value is out of the defined range.
Reading values from settings
After spending some time defining how the extension settings would look, now is the time to use them throughout the application effectively. All the configurations can be read at once by just calling the code below, where the string argument is the extension’s name.
vscode.workspace.getConfiguration('gitmarker')However, in practice, we want to call individual configurations in due course, and similar to what we’ve seen for retrieving data from Data Storage, you can get a specific configuration by simply using the .get<TYPE>(NAME, SCOPE) method.
The configuration confined to that scope is returned when a scope is provided. Once I haven’t set it and, according to the documentation, the default scope is window.
Configuration scopes determine when a setting is available to the user through the Settings editor and whether the setting is applicable. If no scope is declared, the default is window.
const autoSyncEnabled = vscode.workspace
  .getConfiguration(GITMARKER_CONFIG)
  .get<boolean>(ENABLE_AUTO_SYNC);
Now you know how to define and retrieve configurations for your extensions.


